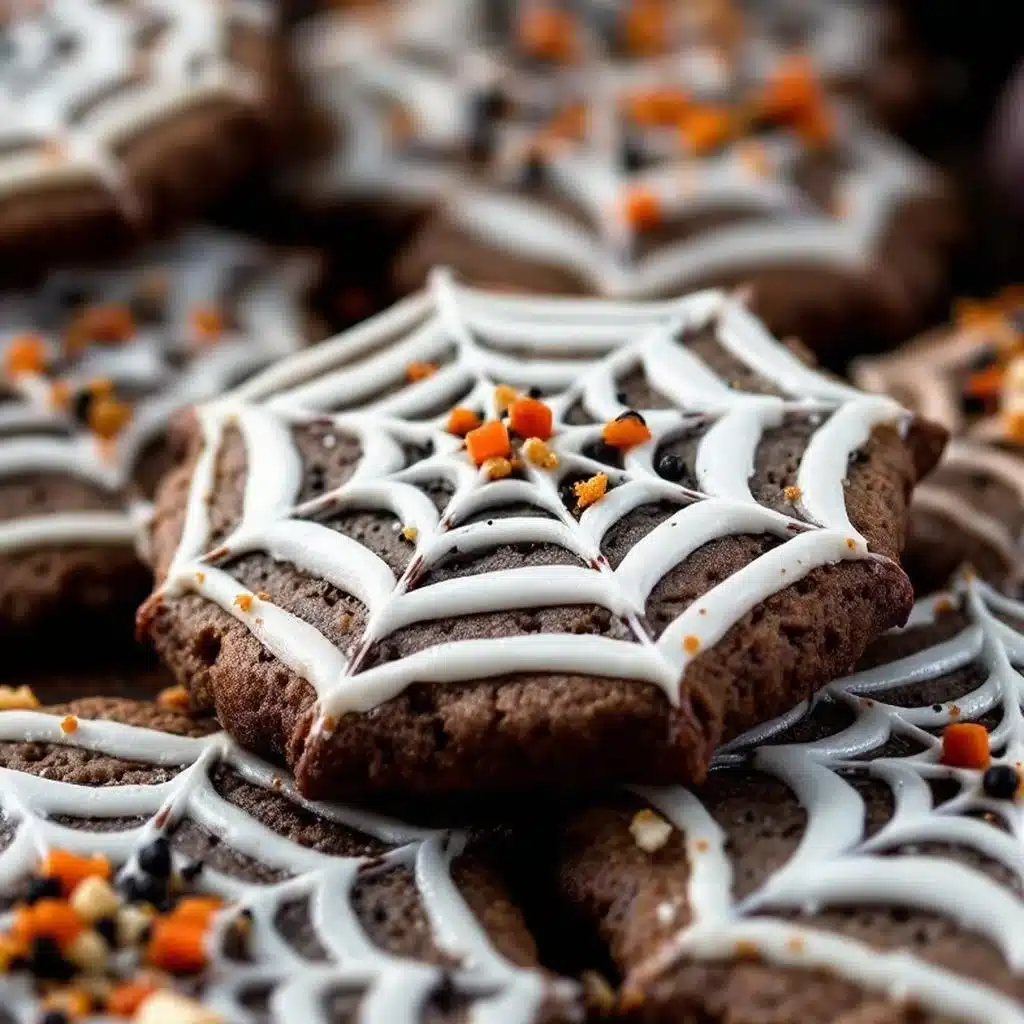
My niece looked up at me with chocolate smeared across her cheek and said, “Auntie, can we make the cookies that look like they have ghosts trapped inside?” and honestly, I knew exactly what she meant. She was talking about these Spooky Spiderweb Sugar Cookies, the ones I’d made for a Halloween party the year before, and apparently they’d left an impression. I hadn’t planned on baking that afternoon, but the way her eyes lit up when she described the webbed pattern—that got me.
There’s something about watching a kid connect the dots between what they see and what they taste. She remembered the delicate white icing webs stretched across buttery, soft sugar cookies, and she wanted to recreate that moment. So we pulled out the butter, let it soften on the counter, and I showed her how to pipe those wispy webs. Her first few attempts looked more like tangled phone cords than spider silk, but by the third cookie, she’d found her rhythm. That’s the thing about this recipe—it looks complicated, like something from a fancy bakery display, but it’s actually forgiving. It lets you mess up and still end up with something that makes people say “whoa” when they walk past the plate.
These cookies aren’t just about the visual trick. The base is a classic sugar cookie with a tender crumb and just enough vanilla to feel familiar. The icing sets firm enough to stack but stays soft when you bite into it. And the web design? It’s basically a cheat code for looking like you spent hours when you really spent twenty minutes decorating while watching a scary movie. I’ve made these for classroom parties, office potlucks, and a Halloween dinner where I also served my crispy buffalo chicken dip loaded potato skins on the side. The cookies always disappear first. Not because they’re fancy, but because they feel like a little piece of Halloween magic you can hold in your hand.
Why You’ll Love This Recipe
Let me tell you why these Spooky Spiderweb Sugar Cookies keep showing up at every Halloween gathering I host. First off, the dough comes together in under fifteen minutes and doesn’t require any chilling time if you’re in a rush—though I do recommend at least thirty minutes for cleaner shapes. The ingredient list is so simple you probably have everything right now. Butter, sugar, flour, eggs, vanilla, and a few pantry staples. No weird extracts or specialty flours. Just honest baking ingredients that work every time.
- Quick & Easy: From start to finish, you’re looking at about an hour including baking and cooling. The decorating takes maybe twenty minutes once you get the hang of the piping motion.
- Simple Ingredients: No trips to a specialty baking store. You’ve got everything in your kitchen right now, I promise.
- Perfect for Halloween Parties: These are the showstoppers on any dessert table. Kids go wild for them, and adults appreciate the nostalgic sugar cookie flavor.
- Crowd-Pleaser: I’ve brought these to three different Halloween events this year alone, and every single time someone asks for the recipe before they’ve even finished their first cookie.
- Unbelievably Delicious: The texture is that perfect balance—crispy edges with a soft, almost pillowy center. The royal icing sets with a slight snap but yields to a creamy interior when you bite.
What makes this version different from every other spiderweb cookie out there is the technique. Most recipes have you flood the entire cookie with icing and then drag a toothpick through it to create the web effect. That works, but it’s messy and the webs never look clean. My method uses a stiff royal icing piped directly onto the baked cookie in concentric circles, then dragged outward with a scribe tool. The result is a crisp, defined web that looks like it was painted on. It’s not just another version—it’s the version that makes people think you’re a professional pastry chef.
Honestly, this recipe makes me feel like I’ve got Halloween under control. When you’re juggling costumes, decorations, and maybe a batch of creamy herb and garlic cheese ball bites for the adults, having a cookie recipe that delivers both on looks and taste is a lifesaver. These cookies are the kind that make you close your eyes after the first bite. That’s not an exaggeration—I watched my neighbor do it last week.
What Ingredients You Will Need
This recipe uses simple, wholesome ingredients to deliver that classic sugar cookie flavor with a soft, tender texture. No complicated lists here—just the basics done right.
For the Sugar Cookie Dough
- Unsalted butter, 1 cup (226g), softened to room temperature (I prefer Land O’Lakes for consistent fat content)
- Granulated sugar, 1 cup (200g)
- Large egg, 1, room temperature
- Vanilla extract, 2 teaspoons (use pure, not imitation—trust me on this)
- All-purpose flour, 2 and ½ cups (312g), spooned and leveled
- Baking powder, 1 teaspoon
- Salt, ½ teaspoon (fine sea salt works best)
For the Royal Icing
- Powdered sugar, 2 cups (240g), sifted to remove lumps
- Meringue powder, 2 tablespoons (this is non-negotiable for the right consistency—I use Wilton brand)
- Warm water, 3-4 tablespoons, added slowly
- Vanilla extract, ½ teaspoon
- Black gel food coloring, 1-2 drops (Americolor Super Black gives the best deep shade without altering consistency)
- White gel food coloring, optional, for brightening the web (I skip this if I want a more natural look)
Ingredient Selection Tips: For the butter, make sure it’s truly softened—you should be able to press your finger into it and leave an indent without it sliding around. Cold butter won’t cream properly and will give you dense cookies. For the flour, always spoon it into your measuring cup and level it off with a knife. Scooping directly from the bag can pack in up to 25% more flour, and nobody wants dry, crumbly sugar cookies.
Substitution Guidance: If you don’t have meringue powder, you can use 2 large egg whites in place of the meringue powder and water combination. Keep in mind that egg white-based royal icing dries harder and can be a bit more brittle. For a dairy-free version, swap the butter with a high-quality vegan butter stick (not the spreadable kind in a tub). I’ve used Earth Balance with good results, though the cookies spread slightly more. For a gluten-free option, use a 1:1 gluten-free baking flour blend that contains xanthan gum. Cup4Cup works beautifully here.
Equipment Needed
You don’t need a professional bakery setup for these Spooky Spiderweb Sugar Cookies, but having the right tools makes the decorating process so much smoother. Here’s what you’ll need:
- Stand mixer or hand mixer: A stand mixer with the paddle attachment is ideal for creaming butter and sugar, but a hand mixer works just fine. I’ve made these with both, and the only difference is your arm gets a workout with the hand mixer.
- Rolling pin: A standard rolling pin works, but I love my adjustable rolling pin with thickness rings. It ensures every cookie is exactly ¼-inch thick, which means even baking across the whole batch.
- Round cookie cutters: You’ll want a 3-inch round cutter for the base cookies. I also use a 2-inch cutter for mini versions—perfect for little hands.
- Baking sheets: Two large baking sheets, preferably light-colored aluminum. Dark sheets absorb more heat and can over-brown the bottoms of your cookies.
- Parchment paper or silicone baking mats: Silicone mats are my go-to because they provide even heat distribution and the cookies release effortlessly.
- Piping bags: Small disposable piping bags, 12-inch size. You’ll need one for the black icing base and one for the white web icing.
- Small round piping tips: A #2 or #3 tip for the black outline and a #1 or #1.5 tip for the white web details. Wilton tips are affordable and last forever if you clean them properly.
- Scribe tool or toothpick: For dragging the icing into web patterns. A scribe tool gives you more control, but toothpicks work in a pinch.
- Cooling rack: Wire cooling racks are essential for letting the royal icing set without trapping moisture underneath.
Budget-Friendly Tip: If you don’t want to invest in piping tips right away, you can snip a tiny corner off a piping bag and use that as your tip. The opening won’t be perfectly round, but for the web effect, it actually adds a nice organic texture. I did this for my first batch and honestly, nobody noticed.
Preparation Method
Let’s walk through this step by step. I’ve made these cookies more times than I can count, and I’ve learned a few things along the way that I’ll share so you don’t make the same mistakes I did.
Step 1: Make the Dough
In the bowl of your stand mixer fitted with the paddle attachment, cream together the softened butter and granulated sugar on medium speed until light and fluffy, about 3 minutes. You’re looking for a pale yellow color and a texture that looks like wet sand. Scrape down the sides of the bowl halfway through. Add the egg and vanilla extract, then beat on low until just combined. Don’t overmix here—you don’t want to incorporate too much air.
Step 2: Add the Dry Ingredients
In a separate bowl, whisk together the flour, baking powder, and salt. With the mixer on low, gradually add the dry ingredients to the wet mixture. Mix until the dough just comes together—it should look shaggy and slightly crumbly but hold together when you squeeze a handful. If it seems too dry, add a teaspoon of milk. Too sticky? Add a tablespoon of flour.
Step 3: Chill the Dough
Divide the dough in half, flatten each portion into a disk about 1-inch thick, and wrap tightly in plastic wrap. Refrigerate for at least 30 minutes, or up to 3 days. Chilling is crucial—it prevents the cookies from spreading too much during baking and makes the dough easier to roll. If you skip this step, your spiderwebs will end up looking more like blobs.
Step 4: Roll and Cut
Preheat your oven to 350°F (175°C) and line two baking sheets with parchment paper or silicone mats. Lightly flour your work surface and rolling pin. Roll one disk of dough to ¼-inch thickness. Use your 3-inch round cutter to cut out cookies, re-rolling the scraps once. Place cookies 2 inches apart on the prepared baking sheets.
Step 5: Bake
Bake for 8-10 minutes, rotating the pans halfway through. The cookies are done when the edges are just barely golden—the centers will look pale and slightly puffed. They’ll continue to set as they cool. Let them rest on the baking sheet for 5 minutes, then transfer to a wire rack to cool completely. Warning: Don’t skip the cooling rack step. If you leave them on the hot pan, the bottoms will continue to cook and can over-brown.
Step 6: Make the Royal Icing
In the bowl of your stand mixer fitted with the whisk attachment (or using a hand mixer), combine the sifted powdered sugar and meringue powder. Add 3 tablespoons of warm water and the vanilla extract. Beat on low until combined, then increase to medium-high and whip for 4-5 minutes. The icing should be thick and glossy, with stiff peaks that hold their shape when you lift the whisk. If it’s too thick, add water a teaspoon at a time. Too thin? Add more powdered sugar, a tablespoon at a time.
Step 7: Color the Icing
Divide the icing into two bowls. Leave one bowl white (or add a tiny drop of white gel coloring if you want it brighter). Add black gel food coloring to the other bowl, starting with one drop and mixing thoroughly before adding more. You want a deep, dark black—this usually takes 1-2 drops of Super Black. Transfer each color to a piping bag fitted with the appropriate tip: #2 for black, #1 for white.
Step 8: Pipe the Base
Using the black icing, pipe a thin outline around the edge of each cooled cookie. Then fill in the center with a back-and-forth zigzag motion. Use a scribe tool or toothpick to spread the icing into an even layer. Let this base layer dry for at least 30 minutes, or until it’s firm to the touch but not completely hard. You want it set enough that the white icing doesn’t sink in, but still slightly tacky so the web pattern adheres.
Step 9: Create the Spiderweb
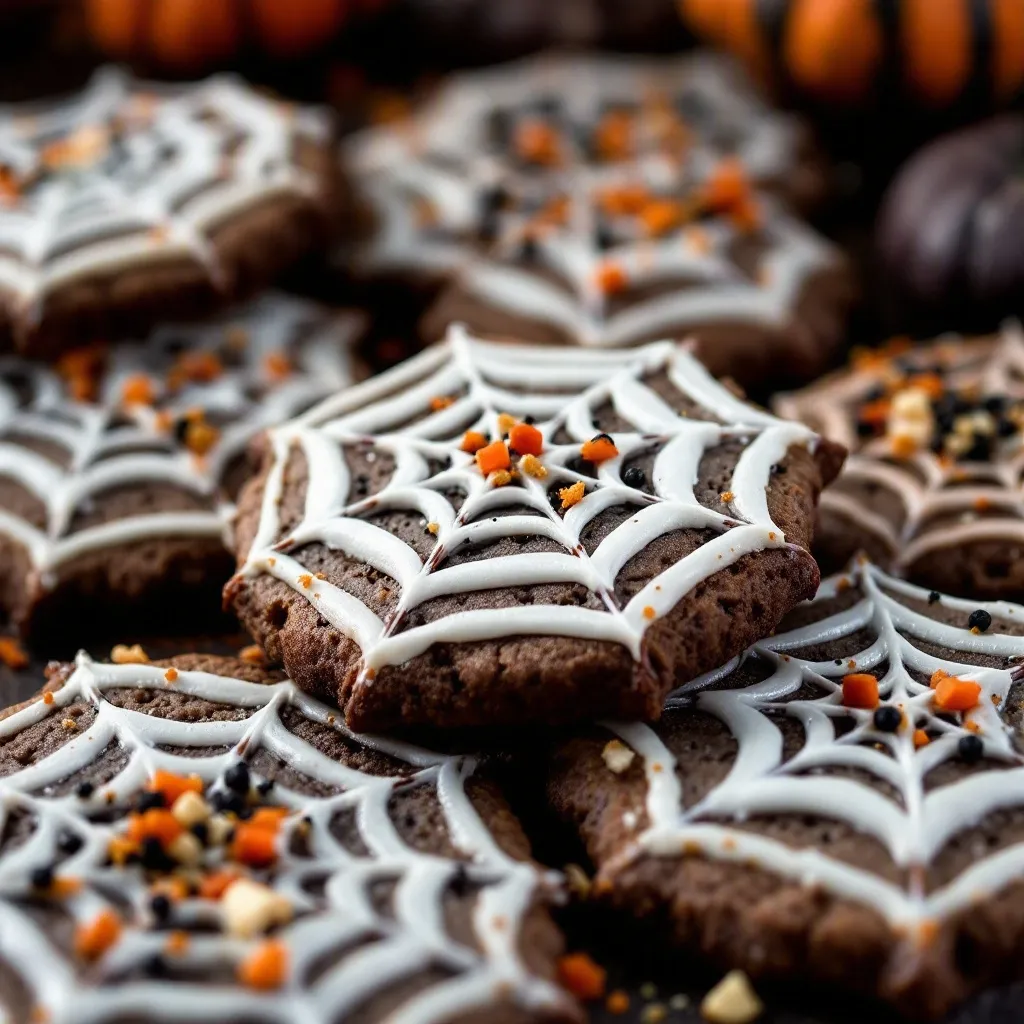
This is the fun part. Using the white icing, pipe a small dot in the center of each cookie. Then pipe concentric circles around it, spacing them about ¼-inch apart. You should have 4-5 circles depending on the size of your cookie. Immediately after piping, use your scribe tool or a toothpick to drag lines from the center outward through all the circles, like drawing spokes on a wheel. Space these spokes evenly around the cookie—I usually do 6-8 spokes. Visual Cue: You’ll see the white icing pull into delicate web-like strands as you drag through it. If the lines look too thick, your white icing is too stiff. If they disappear completely, your base icing is too wet.
Step 10: Let the Icing Set
Allow the decorated cookies to dry completely at room temperature for at least 2 hours, or overnight for best results. The royal icing should be hard to the touch and not smudge when you stack the cookies. Pro Tip: If you’re in a humid environment, run a dehumidifier or place the cookies in a dry, air-conditioned room. Humidity is the enemy of royal icing—it can take forever to set and may end up sticky.
Cooking Tips & Techniques
I’ve messed up these Spooky Spiderweb Sugar Cookies more times than I care to admit, and every failure taught me something valuable. Let me save you some trouble.
The Dough Temperature Trap: The first time I made these, I was impatient and skipped the chilling step. The cookies spread into flat, misshapen discs that looked nothing like the round canvases I needed for the webs. Chill your dough. It’s not optional—it’s the difference between cookies that hold their shape and cookies that look like they melted in the sun.
Icing Consistency is Everything: Royal icing needs to be exactly right for the web technique to work. If it’s too thin, the white circles will bleed into the black base and you’ll lose the definition. If it’s too thick, the lines will look chunky and the drag technique won’t create those delicate web strands. The perfect consistency is what I call “15-second icing”—when you lift your spatula, the ribbon of icing that falls back into the bowl should take about 15 seconds to disappear. Practice this test every time you make a batch.
Timing the Drag: You have to work fast once you pipe the white circles. If you wait too long, the icing starts to crust over and the drag lines will look jagged and broken. Pipe all the circles on one cookie, then immediately drag the spokes. Don’t try to pipe multiple cookies at once—do one cookie at a time from start to finish. I learned this the hard way when I tried to assembly-line the process and ended up with a tray of half-finished webs that looked like abstract art.
Multitasking Strategy: While the cookies are baking and cooling, make your royal icing. While the black base layer is drying, clean up your workspace and prep your piping bags. This way, when it’s time to decorate, everything is ready and you can focus on the web technique without distractions.
The Toothpick Hack: If you don’t have a scribe tool, a wooden toothpick works beautifully. But here’s the trick—dip it in a little cornstarch before dragging. This prevents the toothpick from sticking to the icing and pulling up clumps. I discovered this after ruining a dozen cookies with a sticky toothpick that kept lifting the white icing instead of dragging it.
Variations & Adaptations
One of the best things about this recipe is how easy it is to customize. Here are some variations I’ve tried and loved.
Gluten-Free Version: Substitute the all-purpose flour with a 1:1 gluten-free baking blend that contains xanthan gum. I’ve used Bob’s Red Mill 1-to-1 Baking Flour with excellent results. The cookies will be slightly more tender and may spread a tiny bit more, so chill the dough for a full hour before rolling. The taste is indistinguishable from the original—I served these at a Halloween party last year and nobody guessed they were gluten-free.
Vegan Adaptation: Replace the butter with a high-quality vegan butter stick (I like Miyoko’s for its rich flavor). Use a flax egg (1 tablespoon ground flaxseed mixed with 3 tablespoons water, let sit for 5 minutes) instead of the regular egg. For the royal icing, use aquafaba (the liquid from a can of chickpeas) instead of meringue powder—3 tablespoons of aquafaba whipped with the powdered sugar creates a beautiful, glossy icing that sets just as hard as the traditional version.
Chocolate Spiderwebs: For a darker, more dramatic look, add 2 tablespoons of unsweetened cocoa powder to the cookie dough, reducing the flour by the same amount. The chocolate flavor pairs beautifully with the vanilla royal icing, and the dark cookie base makes the white webs pop even more. I made these for a “Midnight Halloween” party and they were the hit of the night.
Spider Addition: Want to go full creepy-crawly? After the webs are set, attach a small black candy (like a black jellybean or a chocolate ball) to the center of each web using a dab of royal icing. Pipe eight tiny legs radiating from the candy using black icing. It takes an extra two minutes per cookie and the kids absolutely lose their minds over them.
Flavor Twist: Add ½ teaspoon of almond extract along with the vanilla for a subtle nutty undertone that complements the sweetness. Or try 1 teaspoon of lemon zest for a bright, citrusy note that cuts through the rich butter. My personal favorite is a pinch of cinnamon and nutmeg in the dough—it gives the cookies a warm, cozy fall flavor that’s perfect for Halloween baking.
Serving & Storage Suggestions
These Spooky Spiderweb Sugar Cookies are best served at room temperature, which lets the royal icing stay firm while the cookie base remains tender. I like to arrange them on a black platter or a wooden board for maximum visual impact. For Halloween parties, I stack them on a cake stand in a spiral pattern, starting with the largest cookies at the bottom and working up to the smallest.
What to Serve With Them: These cookies pair beautifully with a warm cup of apple cider or a pumpkin spice latte. For a dessert table, arrange them alongside decadent chocolate ganache brownies for a contrast in textures and flavors. They also work well with a scoop of vanilla ice cream—the cold creaminess against the crisp cookie is divine.
Storage Instructions: Store the decorated cookies in an airtight container at room temperature for up to 5 days. Layer them between sheets of parchment paper to prevent the icing from sticking together. Do not refrigerate—the moisture in the fridge can cause the royal icing to become sticky and lose its sheen.
Freezer Instructions: You can freeze the undecorated baked cookies for up to 3 months. Wrap them tightly in plastic wrap, then place in a freezer-safe bag. When you’re ready to decorate, thaw them at room temperature for about 30 minutes, then proceed with the icing. The texture remains perfect. I do not recommend freezing decorated cookies—the royal icing can crack during thawing.
Reheating: These cookies are best enjoyed at room temperature, so no reheating is necessary. If you’ve stored them and they feel a bit stale, pop them in a 300°F (150°C) oven for 3-4 minutes to refresh the texture. Let them cool completely before serving—the icing will firm back up as they cool.
Flavor Development: Interestingly, these cookies taste even better the day after baking. The flavors meld together, and the cookie becomes slightly softer as it absorbs a tiny bit of moisture from the icing. If you can resist eating them all on day one, you’re in for a treat on day two.
Nutritional Information & Benefits
Let’s be real—these are cookies, not health food. But here’s what you’re working with per cookie (based on a 3-inch round cookie with royal icing):
Estimated Nutritional Values (Per Cookie):
- Calories: 185
- Total Fat: 8g
- Saturated Fat: 5g
- Cholesterol: 30mg
- Sodium: 95mg
- Total Carbohydrates: 27g
- Dietary Fiber: 0.5g
- Sugars: 16g
- Protein: 2g
Health Benefits of Key Ingredients: While these are definitely a treat, the butter provides a small amount of vitamin A, and the eggs contribute protein and B vitamins. The vanilla extract contains small amounts of antioxidants. If you use the almond extract variation, you’ll get a touch of vitamin E from the almonds.
Dietary Considerations: This recipe can be adapted for gluten-free diets (as mentioned in the variations section) and vegan diets (using the substitutions above). It is not naturally low-carb or keto-friendly due to the sugar content. The cookies contain dairy (butter) and eggs, so they are not suitable for those with dairy or egg allergies without proper substitutions.
Potential Allergens: This recipe contains wheat (gluten), dairy, and eggs. If using almond extract, it contains tree nuts. Always check your ingredients for cross-contamination warnings if serving to someone with severe allergies.
My Personal Wellness Perspective: I believe in balance. These cookies are a celebration food—they’re for Halloween parties, family gatherings, and moments when you want to create something fun and memorable. One cookie isn’t going to derail anyone’s health goals. Enjoy them mindfully, share them generously, and don’t stress about the numbers.
Conclusion
These Spooky Spiderweb Sugar Cookies have become my official Halloween signature, and I think they’re about to become yours too. They’re the kind of recipe that looks like it took hours of painstaking work, but really, it’s just a few simple techniques that anyone can master. The dough is forgiving, the icing is straightforward, and the web pattern is genuinely fun to pipe.
What I love most about this recipe is how it brings people together. I’ve made these with kids who giggled at every imperfect web, with friends who turned decorating into a competition, and even by myself on a quiet October evening with a horror movie playing in the background. Every batch turns out a little different, and that’s part of the charm. Your webs won’t look exactly like mine, and they shouldn’t. That’s what makes them yours.
So go ahead—preheat that oven, soften that butter, and give yourself an hour to create something that’s equal parts delicious and delightful. And when you make these, I’d love to hear about it. Drop a comment below and tell me how your spiderwebs turned out, or tag me in your photos if you share them online. Did you add the spider? Did you try the chocolate version? Did your kids fight over who got to pipe the circles? I want to know all of it.
Happy Halloween, friends. May your cookies be spooky, your icing be perfectly stiff, and your webs be as tangled or as tidy as you like.
Frequently Asked Questions
Can I make the dough ahead of time?
Absolutely. The dough can be refrigerated for up to 3 days or frozen for up to 3 months. If freezing, wrap it tightly in plastic wrap and place it in a freezer bag. Thaw overnight in the refrigerator before rolling and cutting.
Why did my cookies spread too much?
This usually happens for one of three reasons: the dough wasn’t chilled long enough, the butter was too soft when you creamed it, or you used too much sugar. Make sure your butter is softened but not melted, and don’t skip the 30-minute chill time. If your kitchen is warm, chill for a full hour.
Can I use a different icing for the spiderwebs?
You can, but royal icing gives the best results because it sets hard and creates clean, defined lines. Buttercream will work if you want a softer texture, but the web pattern won’t be as sharp, and the cookies won’t stack well. For a quicker option, use store-bought cookie icing in tubes—just know the webs will look a bit thicker and less delicate.
How do I get my royal icing perfectly black?
Use gel food coloring, not liquid drops. Liquid coloring will thin out your icing and make it runny. Start with one drop of Super Black gel and mix thoroughly. If you need it darker, add another drop. Let the color develop for a few minutes—it deepens over time. For the most intense black, make the icing a day ahead and let it sit overnight in an airtight container at room temperature.
Can I make these cookies without a piping bag?
Yes, though it’s trickier. You can use a small zip-top bag with a tiny corner snipped off. The lines won’t be as precise, but for the web pattern, the organic look can actually work in your favor. Alternatively, use a squeeze bottle with a fine tip—I’ve seen bakers use these with great success for the concentric circles.
Pin This Recipe!
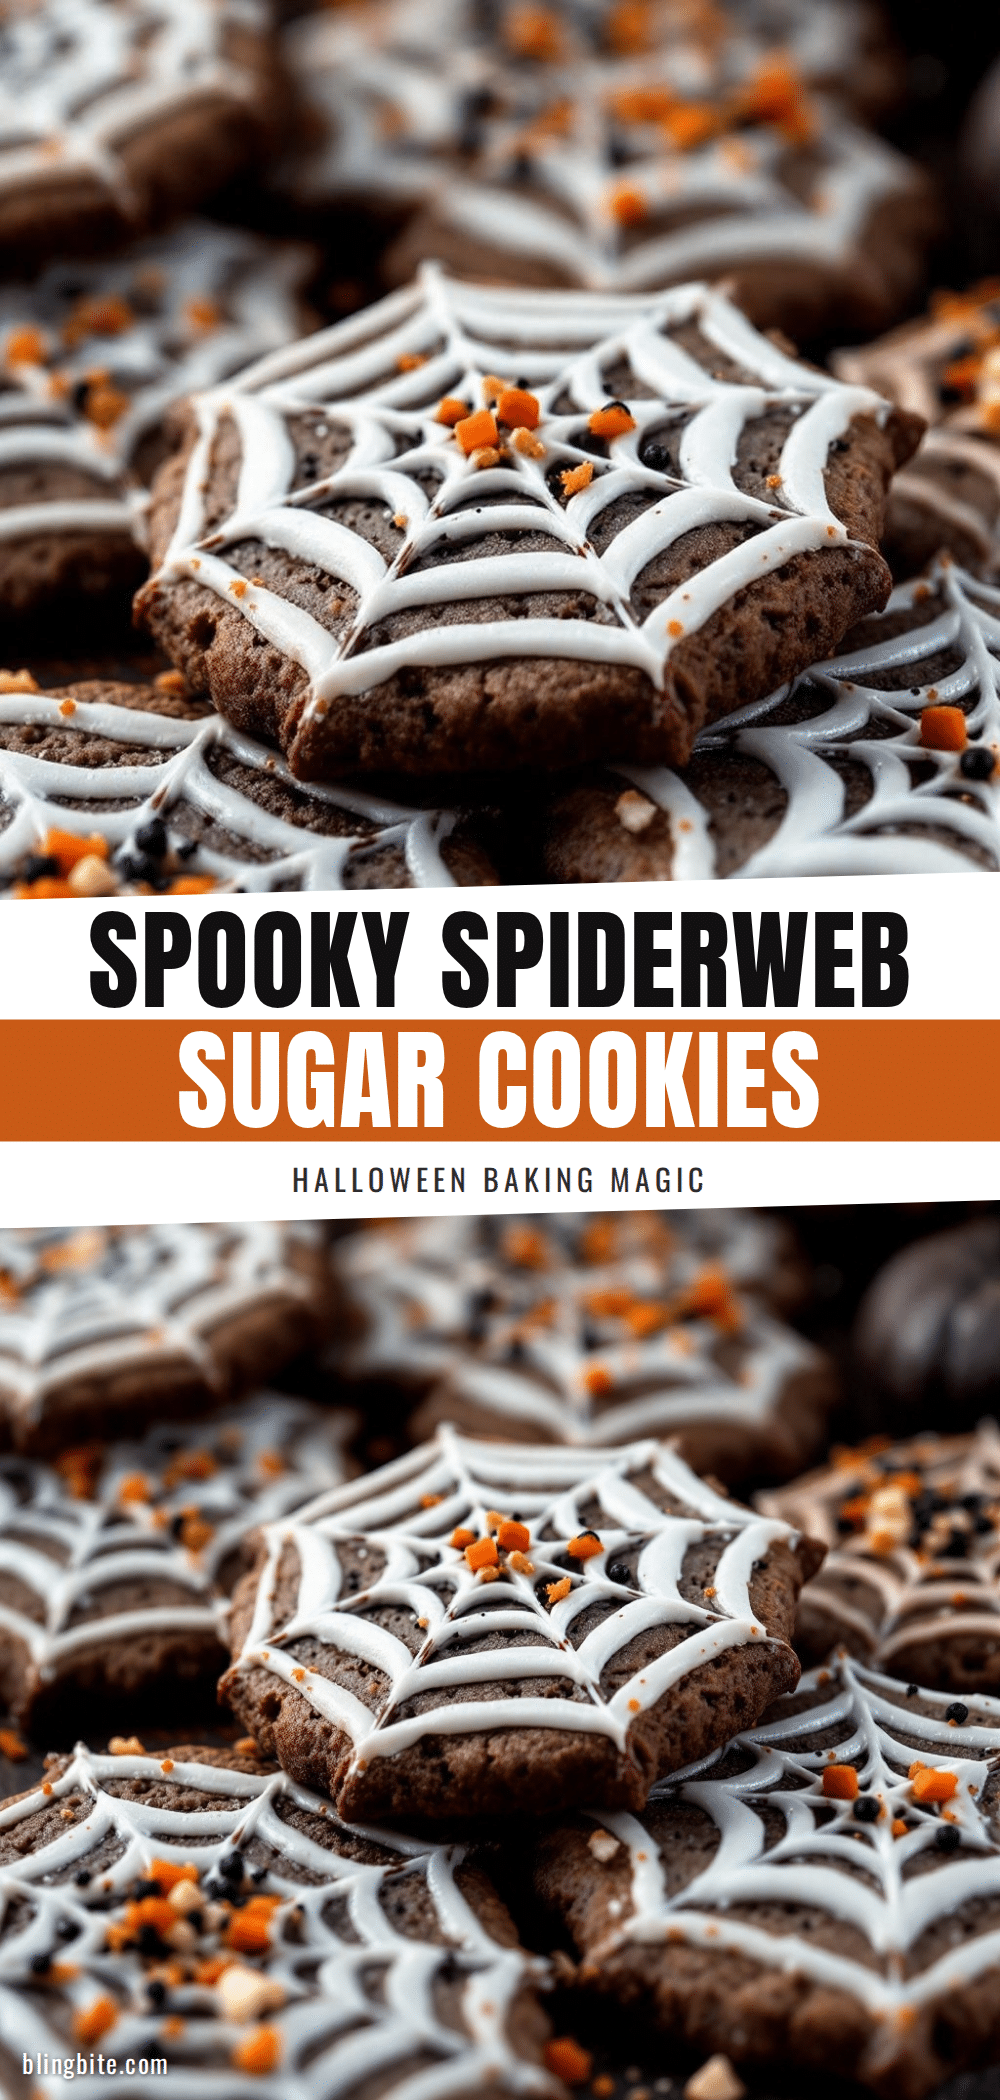
Spooky Spiderweb Sugar Cookies: Easy Halloween Recipe
These Spooky Spiderweb Sugar Cookies feature a tender, buttery sugar cookie base topped with a crisp royal icing web. They look like a professional bakery creation but are surprisingly easy to make, perfect for Halloween parties and family baking.
- Prep Time: 15 minutes
- Cook Time: 10 minutes
- Total Time: 1 hour (including cooling and decorating)
- Yield: 24 servings 1x
- Category: Dessert
- Cuisine: American
Ingredients
- 1 cup (226g) unsalted butter, softened to room temperature
- 1 cup (200g) granulated sugar
- 1 large egg, room temperature
- 2 teaspoons pure vanilla extract
- 2 and ½ cups (312g) all-purpose flour, spooned and leveled
- 1 teaspoon baking powder
- ½ teaspoon fine sea salt
- 2 cups (240g) powdered sugar, sifted
- 2 tablespoons meringue powder
- 3–4 tablespoons warm water
- ½ teaspoon vanilla extract
- 1–2 drops black gel food coloring
- White gel food coloring (optional)
Instructions
- In a stand mixer fitted with the paddle attachment, cream together the softened butter and granulated sugar on medium speed until light and fluffy, about 3 minutes. Scrape down the sides halfway through.
- Add the egg and vanilla extract, then beat on low until just combined. Do not overmix.
- In a separate bowl, whisk together the flour, baking powder, and salt. With the mixer on low, gradually add the dry ingredients to the wet mixture. Mix until the dough just comes together—it should look shaggy and slightly crumbly but hold together when squeezed.
- Divide the dough in half, flatten each portion into a 1-inch thick disk, and wrap tightly in plastic wrap. Refrigerate for at least 30 minutes, or up to 3 days.
- Preheat oven to 350°F (175°C) and line two baking sheets with parchment paper or silicone mats.
- Lightly flour your work surface and rolling pin. Roll one disk of dough to ¼-inch thickness. Use a 3-inch round cutter to cut out cookies, re-rolling scraps once. Place cookies 2 inches apart on prepared baking sheets.
- Bake for 8-10 minutes, rotating pans halfway through. Cookies are done when edges are just barely golden; centers will look pale and slightly puffed. Let rest on baking sheet for 5 minutes, then transfer to a wire rack to cool completely.
- In a stand mixer fitted with the whisk attachment, combine sifted powdered sugar and meringue powder. Add 3 tablespoons warm water and vanilla extract. Beat on low until combined, then increase to medium-high and whip for 4-5 minutes until thick and glossy with stiff peaks.
- Divide icing into two bowls. Leave one bowl white (add a tiny drop of white gel coloring if desired). Add black gel food coloring to the other bowl, starting with 1 drop and mixing thoroughly. Transfer each color to a piping bag fitted with a #2 tip for black and #1 tip for white.
- Using black icing, pipe a thin outline around the edge of each cooled cookie, then fill the center with a back-and-forth zigzag motion. Use a scribe tool or toothpick to spread into an even layer. Let dry for at least 30 minutes until firm to the touch but still slightly tacky.
- Using white icing, pipe a small dot in the center of each cookie, then pipe concentric circles around it, spacing them about ¼-inch apart (4-5 circles). Immediately use a scribe tool or toothpick to drag lines from the center outward through all the circles, like spokes on a wheel, spacing them evenly (6-8 spokes).
- Allow decorated cookies to dry completely at room temperature for at least 2 hours, or overnight for best results. Royal icing should be hard to the touch and not smudge when stacked.
Notes
Chill the dough for at least 30 minutes to prevent spreading. For the royal icing, use gel food coloring (not liquid) to avoid thinning. Work one cookie at a time when piping the web—pipe all circles then immediately drag spokes. If using a toothpick, dip it in cornstarch to prevent sticking. Store decorated cookies in an airtight container at room temperature for up to 5 days; do not refrigerate. Undecorated baked cookies can be frozen for up to 3 months.
Nutrition
- Serving Size: 1 cookie
- Calories: 185
- Sugar: 16
- Sodium: 95
- Fat: 8
- Saturated Fat: 5
- Carbohydrates: 27
- Fiber: 0.5
- Protein: 2
Keywords: Halloween cookies, spiderweb cookies, sugar cookies, royal icing, Halloween dessert, easy Halloween recipe, spooky cookies


